Understanding your bathroom plumbing is key to smoothly installing a new faucet. Ensure compatibility by matching water pressure, flow rates, and connection types (compression, cartridge, ceramic disk) with your existing system. Gather tools, clear workspace, shut off water supply, remove old faucet, reattach water lines securely, test connections, maintain ventilation, and insulate pipes for cold months to ensure a safe, efficient bathroom plumbing setup.
“Transform your bathroom with a new faucet—a simple DIY project that can elevate your space. This comprehensive guide walks you through the entire process, from understanding your faucet types and preparing your work area to installing and testing your new fixture. Learn how to safely disconnect old plumbing, install a new faucet, reattach water lines, and ensure proper functionality. Master these steps, and you’ll have a stylish, functional bathroom faucet with enhanced bathroom plumbing.”
Understanding Your Bathroom Faucet Types and Compatibility

When it comes to bathroom faucet installation, understanding your options is key to a successful and smooth process. Different types of faucets cater to various styles and needs—from traditional designs to modern, sleek looks. Knowing the compatibility of your chosen faucet with your bathroom plumbing is equally important.
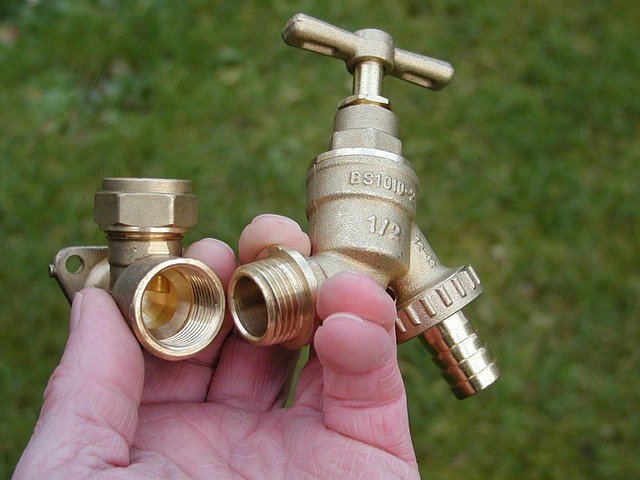
Bathroom plumbing systems can vary, so ensuring that your new faucet aligns with these specifics is vital. This includes matching water pressure requirements, flow rates, and even the type of connections (such as compression, cartridge, or ceramic disk). Checking the product specifications against your existing plumbing setup will save you time and potential headaches down the line, guaranteeing a hassle-free installation experience.
Preparing the Work Area and Gather Necessary Tools
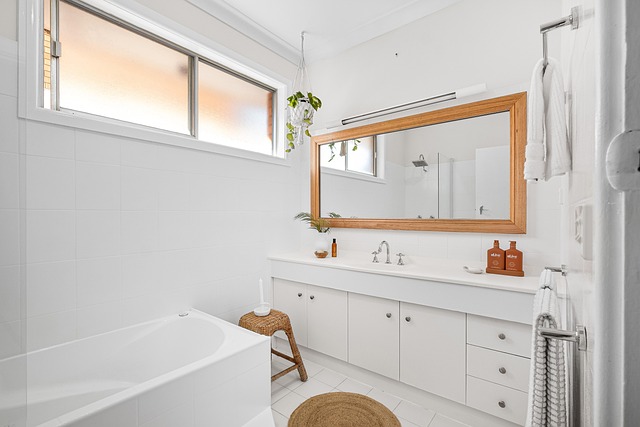
Before installing a new bathroom faucet, ensure your work area is prepared and all necessary tools are gathered. Clear the bathroom counter and floor, moving all items aside to create a clutter-free workspace. This includes removing any accessories or decorations that might get in the way during the installation process.
Gather your tools, which typically include a wrench, pliers, and possibly a new faucet adapter or aerator. Familiarize yourself with these tools beforehand to ensure a smooth installation. Properly prepared plumbing is key for successful bathroom faucet installation, ensuring the job gets done efficiently and effectively while minimizing potential leaks or damage to your bathroom’s plumbing system (bathroom plumbing).
Disconnecting the Old Faucet and Plumbing
When ready to install a new bathroom faucet, disconnecting the old one is the first step in what can be a straightforward DIY project for homeowners. Start by shutting off the water supply valves located under the sink. This ensures no water leaks during the disassembly process. Next, carefully remove any decorative covers or plates securing the old faucet. With these initial steps complete, you’ll gain access to the plumbing connections.
Use a wrench or pliers to loosen and detach the water lines from the back of the old faucet. Take note of how each line is connected as reattaching them correctly is essential for seamless bathroom plumbing. Once disconnected, carefully remove the old faucet from its mounting holes. This may involve unscrewing various components and parts. With the old faucet out of the way, you’re one step closer to installing your new bathroom fixture.
Installing the New Faucet: Step-by-Step Guide

Installing a new bathroom faucet is a relatively straightforward process, but it requires some basic plumbing knowledge and tools. Before starting, ensure you have all the necessary parts and tools ready, including the new faucet, an adjustable wrench, pliers, and pipe tape. Turn off the water supply to your bathroom by closing the corresponding valve under the sink. This step is crucial for a safe installation and prevents any unexpected water leaks during work.
Now, remove the old faucet by unscrewing the handle and spout with a wrench or pliers. Be careful not to damage the pipes or connections. Next, clean the sink area and apply pipe tape to the threads of the new faucet’s stems to ensure a secure fit. Thread in the new faucet components, starting with the handles and then the spout, until they are snug. Double-check that all parts are securely fastened, and you’re ready to turn on the water supply again.
Reattaching Water Lines and Testing the Faucet Functionality

After carefully removing the old bathroom faucet and preparing the new one, it’s time to reattach the water lines. This step is crucial in any bathroom plumbing project. Ensure that both hot and cold water supply lines are securely connected to the new faucet according to the manufacturer’s instructions. Double-check all connections for leaks by turning on the taps and inspecting the area around the connections.
Once the water lines are reattached, it’s essential to test the faucet functionality. Turn on the water supply and observe if any leaks occur at the base of the faucet or where the spout meets the counter. Adjust the water pressure as needed and ensure that both hot and cold water flow smoothly and evenly. This final testing step guarantees your new bathroom faucet is fully functional and ready for daily use.
Final Touches and Ensuring Proper Bathroom Faucet Pluming Safety

After successfully installing the new bathroom faucet, it’s time to add the final touches and ensure your plumbing safety. Double-check all connections to prevent any leaks by tightening fittings and replacing O-rings if needed. Turn on the water supply valves and test the faucet for any dripping or unusual noises. If everything seems secure and functions properly, move on to the next step—insulating exposed pipes to prevent freezing during colder months.
Remember that proper bathroom plumbing safety is paramount. Always be mindful of potential hazards like scalding hot water or toxic chemical residues from pipes. Ensure ventilation in your bathroom to maintain optimal humidity levels, which can help prevent mold growth and other health issues associated with damp spaces. By taking these final precautions, you’ll have a secure and comfortable bathroom setting.